
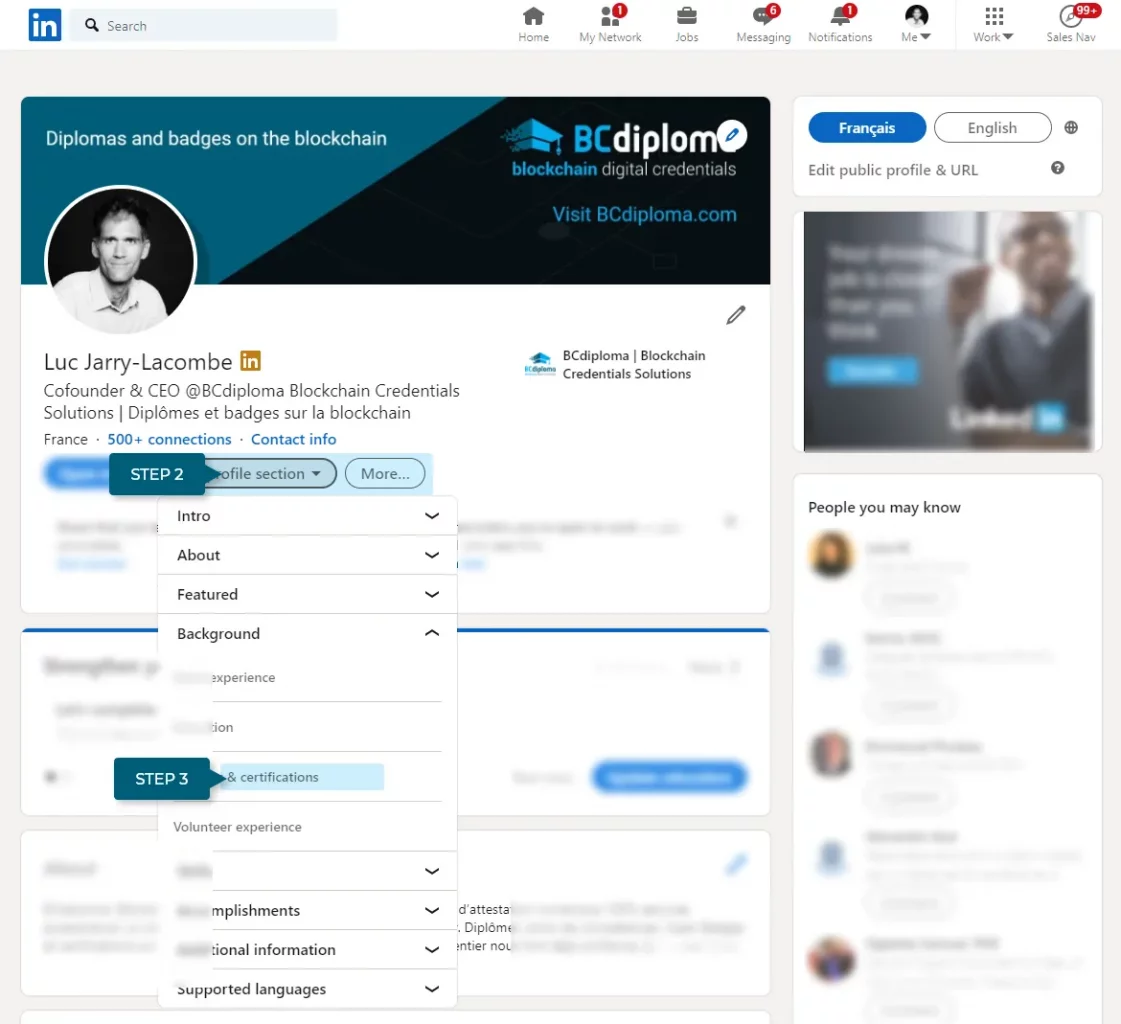
To add a badge to your LinkedIn profile, follow these steps: Go to your LinkedIn homepage, click the My Activity dropdown, and select My Badges. Click Add to Profile (not all badges can be connected to LinkedIn).
Log into LinkedIn and click Save. The badge will appear in the Licenses & Certifications section of your LinkedIn profile. LinkedIn users can easily enhance their profiles by adding badges. This blog post will provide step-by-step instructions on how to add a badge to your LinkedIn profile.
By following these simple steps, you can showcase your achievements and certifications in the Licenses & Certifications section of your profile. Adding a badge not only adds credibility to your profile but also catches the attention of potential employers and professional connections. So, let’s dive into the process of adding a badge to your LinkedIn profile and make your profile stand out from the crowd.
Credit: www.bcdiploma.com
Introduction To Linkedin Badges
To add a badge to your LinkedIn profile, navigate to your My Activity dropdown and select My Badges. Click Add to Profile and log into LinkedIn to save the badge in the Licenses & Certifications section. Some badges can’t be connected to LinkedIn, so choose accordingly.
LinkedIn badges are a powerful way to showcase your skills, achievements, and credentials on your LinkedIn profile. These visual representations of your accomplishments can help you stand out to potential employers, clients, and colleagues, and add credibility to your professional profile.
The Value Of Linkedin Badges
LinkedIn badges hold significant value as they provide a quick and visually appealing way for others to understand your expertise and accomplishments. They offer a snapshot of your skills and certifications, making it easier for recruiters and connections to assess your qualifications at a glance.
Types Of Linkedin Badges
- Skills Endorsement Badges
- Certification Badges
- Hiring Badges
- Verified Badges
- #OpenToWork Badges
Each type of badge serves a different purpose, from showcasing specific skills to indicating your availability for new job opportunities. By leveraging these various badges, you can enhance your professional brand and attract the attention of the right audience on LinkedIn.
Credit: www.bcdiploma.com
Preparation For Adding Badges
Before you can add badges to your LinkedIn profile, there are a few key steps to prepare for the process. This includes gathering necessary badge information and understanding LinkedIn’s requirements for badge additions.
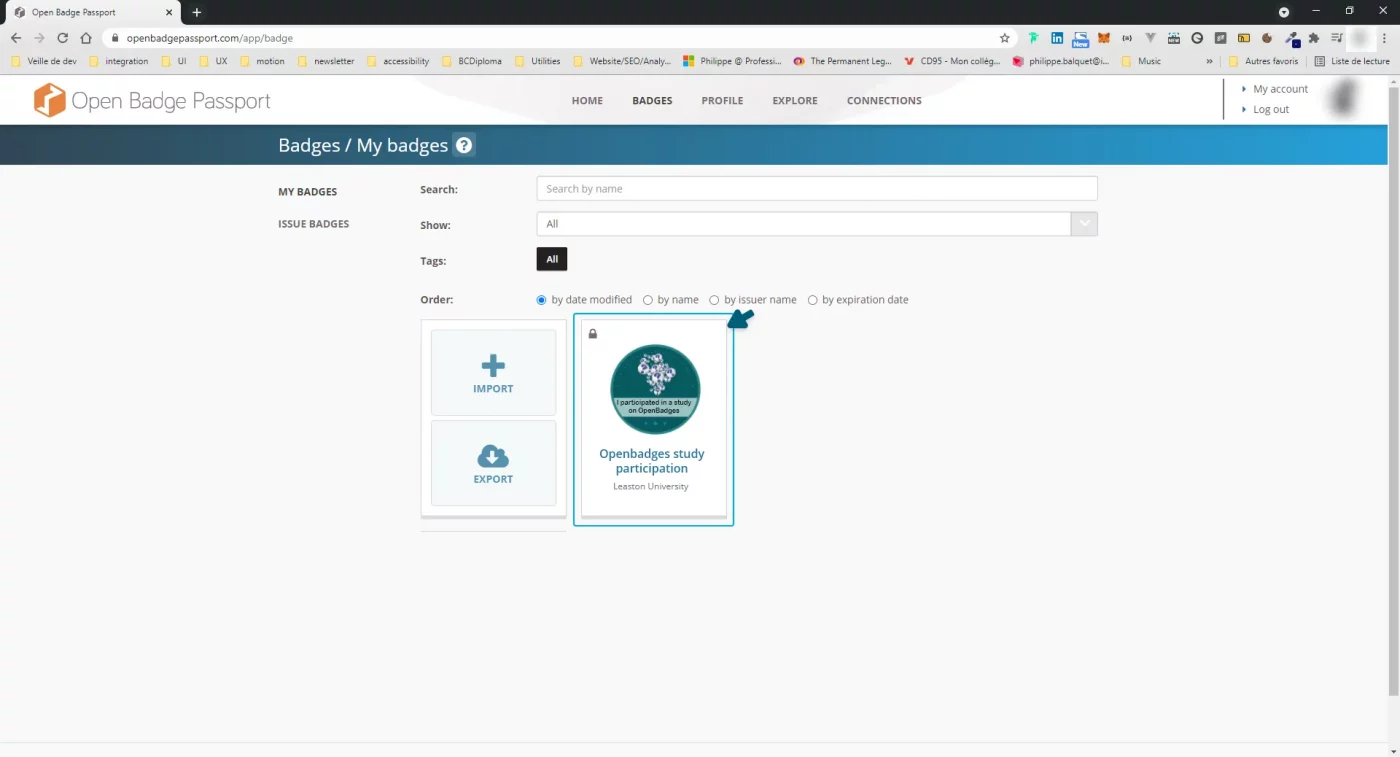
Gathering Necessary Badge Information
First, it’s important to gather all the essential information related to the badge you want to add. This includes the badge image, the issuing organization, the date of issuance, and any relevant metadata associated with the badge.
Understanding Linkedin’s Requirements
Next, it’s crucial to understand LinkedIn’s specific requirements for adding badges to your profile. This may involve ensuring that the badge meets certain criteria set by LinkedIn, such as the format of the badge image, the authenticity of the issuing organization, and the relevance of the badge to your professional profile.
Step-by-step Badge Addition
Learn how to add a badge to your LinkedIn profile with these simple steps. Navigate to your My Badges section, select the badge, and click “Add to Profile. ” Log into LinkedIn, save, and your badge will display in the Licenses & Certifications section of your profile.
Step-by-Step Badge Addition Adding badges to your LinkedIn profile can help to showcase your accomplishments and increase your credibility. Here’s how to do it step-by-step: Navigating to ‘My Activity’ 1. Log into your LinkedIn account and navigate to the ‘Home’ page. 2. Click on the ‘My Activity’ dropdown, located on the top left corner of the page. Selecting ‘My Badges’ 3. From the dropdown list, select ‘My Badges’. 4. This will take you to your Sertifier account, where you can view all of your earned badges. Using ‘Add to Profile’ 5. Click on the badge that you want to add to your LinkedIn profile. 6. Click on the ‘Add to Profile’ button located on the bottom right corner of the badge. 7. You will be prompted to log into your LinkedIn account. 8. Once you’ve logged in, you will be able to customize the information that you want to display with the badge. 9. Click ‘Save’ to add the badge to your LinkedIn profile. That’s it! Your badge will now be displayed in the ‘Licenses & Certifications’ section of your LinkedIn profile, providing valuable information to potential employers and connections. In summary, adding badges to your LinkedIn profile is a great way to showcase your achievements and increase your credibility. By following these simple steps, you can easily add your earned badges to your LinkedIn profile and stand out from the crowd.Adding Hiring Badges
To add a badge to your LinkedIn profile, follow these steps: Navigate to your Home page, click on the My Activity dropdown, and select My Badges. Click on Add to Profile (not all badges can be connected to LinkedIn). Log into LinkedIn and click Save.
Your badge will then display in the Licenses & Certifications section of your LinkedIn profile.
Locating The Hiring Section
When you’re ready to add a hiring badge to your LinkedIn profile, you need to start by locating the hiring section on your profile. This can be done by clicking on your profile and then looking for the option that allows you to add badges related to hiring.
Customizing The Hiring Badge
After locating the hiring section, you can customize the hiring badge to make it more personalized. This can be done by selecting the badge that best represents your hiring needs and then adding it to your profile. You can also choose to add a job post via #Hiring on LinkedIn to further enhance your hiring presence.
Adding a hiring badge to your LinkedIn profile is a great way to showcase your hiring needs and attract potential candidates. By following these simple steps, you can effectively utilize the hiring badge feature on LinkedIn to strengthen your professional network.
Verifying Your Profile
To add a badge to your LinkedIn profile, follow these steps: Navigate to Home, click the My Activity dropdown and select My Badges, then click Add to Profile. Log into LinkedIn and click Save. The badge will appear in the Licenses & Certifications section of your LinkedIn profile.
Verifying Your Profile If you want to showcase your professional achievements and skills on LinkedIn, adding a badge to your profile is a great way to do it. However, to ensure that your badge is legitimate, you will need to verify your profile. In this section, we will cover the steps to start and complete the verification process. Starting the verification process To start the verification process, first, navigate to your LinkedIn profile and click on the “More” icon. Then, select “About this profile” and click on “Verify now.” You will be redirected to the verification process through CLEAR, a third-party verification service. Completing verification via CLEAR To complete the verification process, you will need to provide CLEAR with your personal phone number or email and follow the instructions provided. Once your identity has been verified, you will receive a confirmation email. After completing the verification process, you can add your badge to your LinkedIn profile by clicking on the “My Activity” dropdown and selecting “My Badges.” Then, click on “Add to Profile” (not all badges can be connected to LinkedIn) and log into your LinkedIn account. Finally, click “Save,” and your badge will appear in the “Licenses & Certifications” section of your LinkedIn profile. In conclusion, verifying your profile is an essential step to ensure that your badge is legitimate and showcases your true professional achievements. By following the steps outlined in this section, you can easily add your badge to your LinkedIn profile and stand out to potential employers and clients.Showcasing Open To Work
Learn how to showcase your open to work status on LinkedIn by adding a badge to your profile. Follow the simple steps to navigate to your profile, click on the “Open to” button, and provide the necessary information. Stand out to potential employers and increase your chances of landing your dream job.
Activating The #opentowork Feature
If you’re currently on the hunt for new job opportunities and want to let potential employers know, LinkedIn’s #OpenToWork feature is a great way to do so. To activate this feature, simply follow these steps:- Click on the “Me” icon at the top of your LinkedIn homepage
- Select “View profile”
- Click on the “Open to” button
- Select “Finding a new job”
- Provide the requested information in the pop-up window that appears
- Click “Add to profile”
Filling In Job Seeking Details
Once you’ve activated the #OpenToWork feature, it’s important to fill in all the relevant job seeking details to make it easier for potential employers to find you. This includes specifying the types of roles you’re interested in, your preferred location, and your availability. To add this information, simply follow the prompts provided when activating the #OpenToWork feature. In addition to filling in job seeking details, you can also add a photo frame that says “#Hiring” to your profile picture to further indicate your job seeking status. To do this, simply click on “View profile”, select “Open to” below your profile picture, and choose the “#Hiring” photo frame. By showcasing your openness to new job opportunities, you increase your chances of being noticed by potential employers on LinkedIn. So don’t hesitate to activate the #OpenToWork feature and fill in all the relevant job seeking details to make the most of this feature.Promoting Badges Through Posts
To add a badge to your LinkedIn profile, follow these steps: navigate to your home page, click the “My Activity” dropdown and select “My Badges”, then click “Add to Profile” (not all badges can be connected to LinkedIn). Log into LinkedIn and click “Save”.
The badge will be displayed in the Licenses & Certifications section of your LinkedIn profile.
Creating An Engaging Badge Post
When creating a post to showcase your digital badges on LinkedIn, it’s essential to make it engaging and attention-grabbing. Start by selecting a high-quality image of your badge to ensure that it captures the viewer’s interest immediately. Craft a compelling caption that highlights the significance of the badge and how it has contributed to your professional development. Keep the content concise and impactful to resonate with your audience effectively.
Maximizing Visibility Within Your Network
To ensure that your badge post reaches a wider audience within your LinkedIn network, consider incorporating relevant hashtags that are popular within your industry. This will increase the discoverability of your post and attract professionals who are interested in the skills or achievements represented by your badge. Additionally, encourage engagement by asking a thought-provoking question or prompting your connections to share their experiences related to the badge topic.
Credit: m.youtube.com
Sharing Certifications And Digital Badges
To add a badge to your LinkedIn profile, follow these steps: Navigate to Home, click the My Activity dropdown, and select My Badges. Click Add to Profile (not all badges can be connected to LinkedIn). Log into LinkedIn and click Save.
The badge will be displayed in the Licenses & Certifications section of your LinkedIn profile.
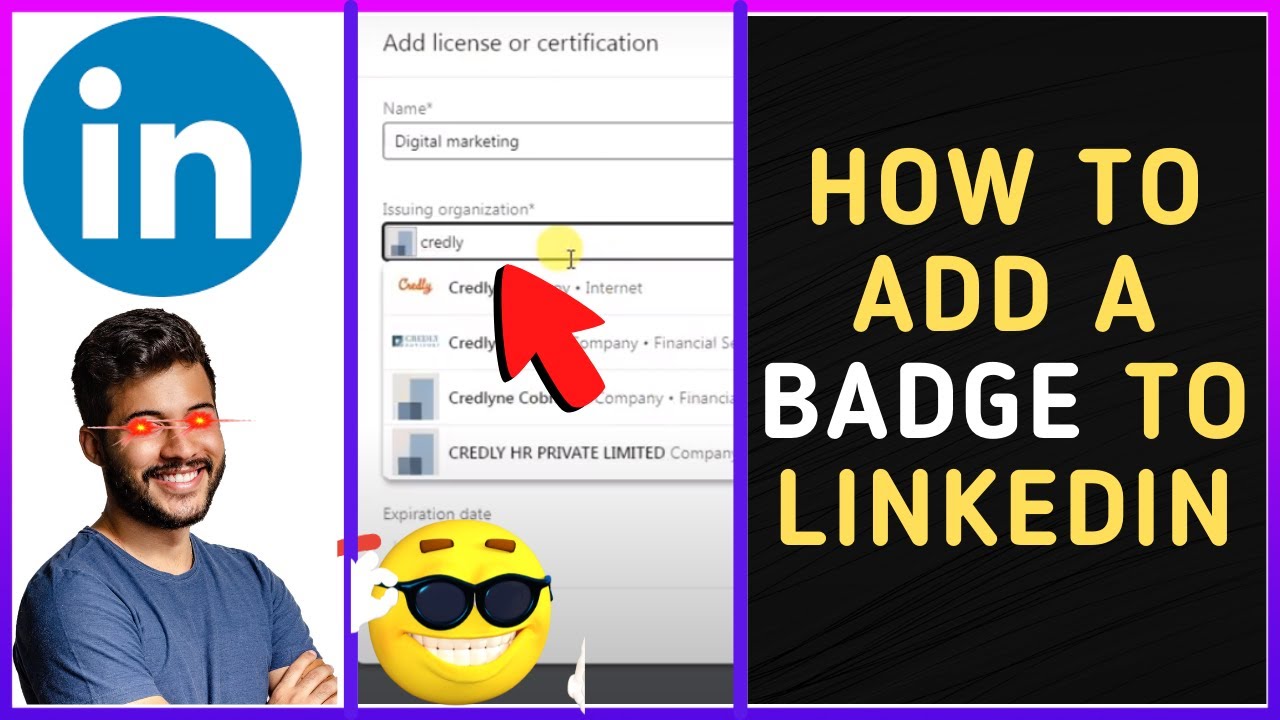
Sharing Certifications and Digital Badges If you have earned a certification or digital badge, LinkedIn is a great platform to showcase your achievements to potential employers and professional connections. By adding badges to your LinkedIn profile, you can demonstrate your skills and expertise in a visually appealing way. In this article, we will discuss how to add badges to your LinkedIn profile, focusing on the subheading: Sharing Certifications and Digital Badges. Using the Dashboard for sharing One way to share your badges on LinkedIn is through the dashboard provided by the badge issuer. The dashboard typically includes a shareable link or HTML code that you can use to display your badges on your LinkedIn profile. To use the dashboard for sharing, follow these steps: 1. Log in to your badge issuer’s dashboard. 2. Find the badge you want to share and click on it. 3. Look for the shareable link or HTML code provided by the badge issuer. 4. Copy the link or code. 5. Log in to your LinkedIn account. 6. Click on “Add Profile Section” and select “Licenses & Certifications.” 7. Fill in the required information and paste the link or code in the URL field. 8. Click on “Save.” Adding to Licenses & Certifications section Another way to add badges to your LinkedIn profile is by adding them to the Licenses & Certifications section. To add badges to this section, follow these steps: 1. Log in to your LinkedIn account. 2. Click on “Add Profile Section” and select “Licenses & Certifications.” 3. Fill in the required information, such as the name of the badge, the issuing organization, and the date it was earned. 4. In the “Credential URL” field, paste the URL of the badge or the URL provided by the badge issuer. 5. Click on “Save.” By following these simple steps, you can easily showcase your certifications and digital badges on your LinkedIn profile. This will help you stand out from the crowd and catch the attention of potential employers and professional connections.Frequently Asked Questions
How Do I Add A Badge To My Linkedin Profile?
To add a badge to your LinkedIn profile, follow these steps: 1. Go to your LinkedIn homepage. 2. Click on the “My Activity” dropdown and select “My Badges. ” 3. Click on “Add to Profile” (not all badges can be connected to LinkedIn).
4. Log into your LinkedIn account. 5. Click on “Save. ” 6. The badge will now display in the “Licenses & Certifications” section of your LinkedIn profile.
How Do I Add A Hiring Badge To My Linkedin Profile?
To add a Hiring badge to your LinkedIn profile, click “View profile” and then “Open to” below your profile photo. Select “Hiring” from the drop-down, and click “Add to profile” to display the badge and the #Hiring photo frame on your profile.
How Do I Add A Verified Badge On Linkedin?
To add a verified badge on LinkedIn, go to your profile and click “About this profile. ” Then, click “Verify now” to start the process. You’ll be redirected to a verification process through CLEAR. Enter your personal phone number or email and follow the instructions.
How Do I Add A Badge To Open To Work On Linkedin?
To add a badge to open to work on LinkedIn, follow these steps: Click the Me icon on your LinkedIn homepage, click View profile, click the Open to button, select Finding a new job, provide the requested information, and click Add to profile.
To add a badge to your LinkedIn profile, navigate to Home, select My Badges from the My Activity dropdown, click Add to Profile, and log into LinkedIn. Your badge will display in the Licenses & Certifications section of your profile.
Conclusion
Adding a badge to your LinkedIn profile is a simple process that can enhance your professional image. By following a few easy steps, you can showcase your achievements, certifications, and licenses, making your profile stand out to potential employers and connections.
Take advantage of this opportunity to highlight your expertise and increase your visibility on the platform. So, go ahead and add that badge to your LinkedIn profile today!